Create and Manage Asset Kits
Asset Kits help you group the items your team commonly assigns together. Create a kit once, then select the available items and check them out to a user when needed.
For example, when provisioning a new team member, you may need to issue a laptop, assign specific software licences, and provide accessories or peripherals such as a headset, charger, or monitor.
This guide explains how to create a kit, check it out to a user, and check the individual items back in during off-boarding.
Create a Kit
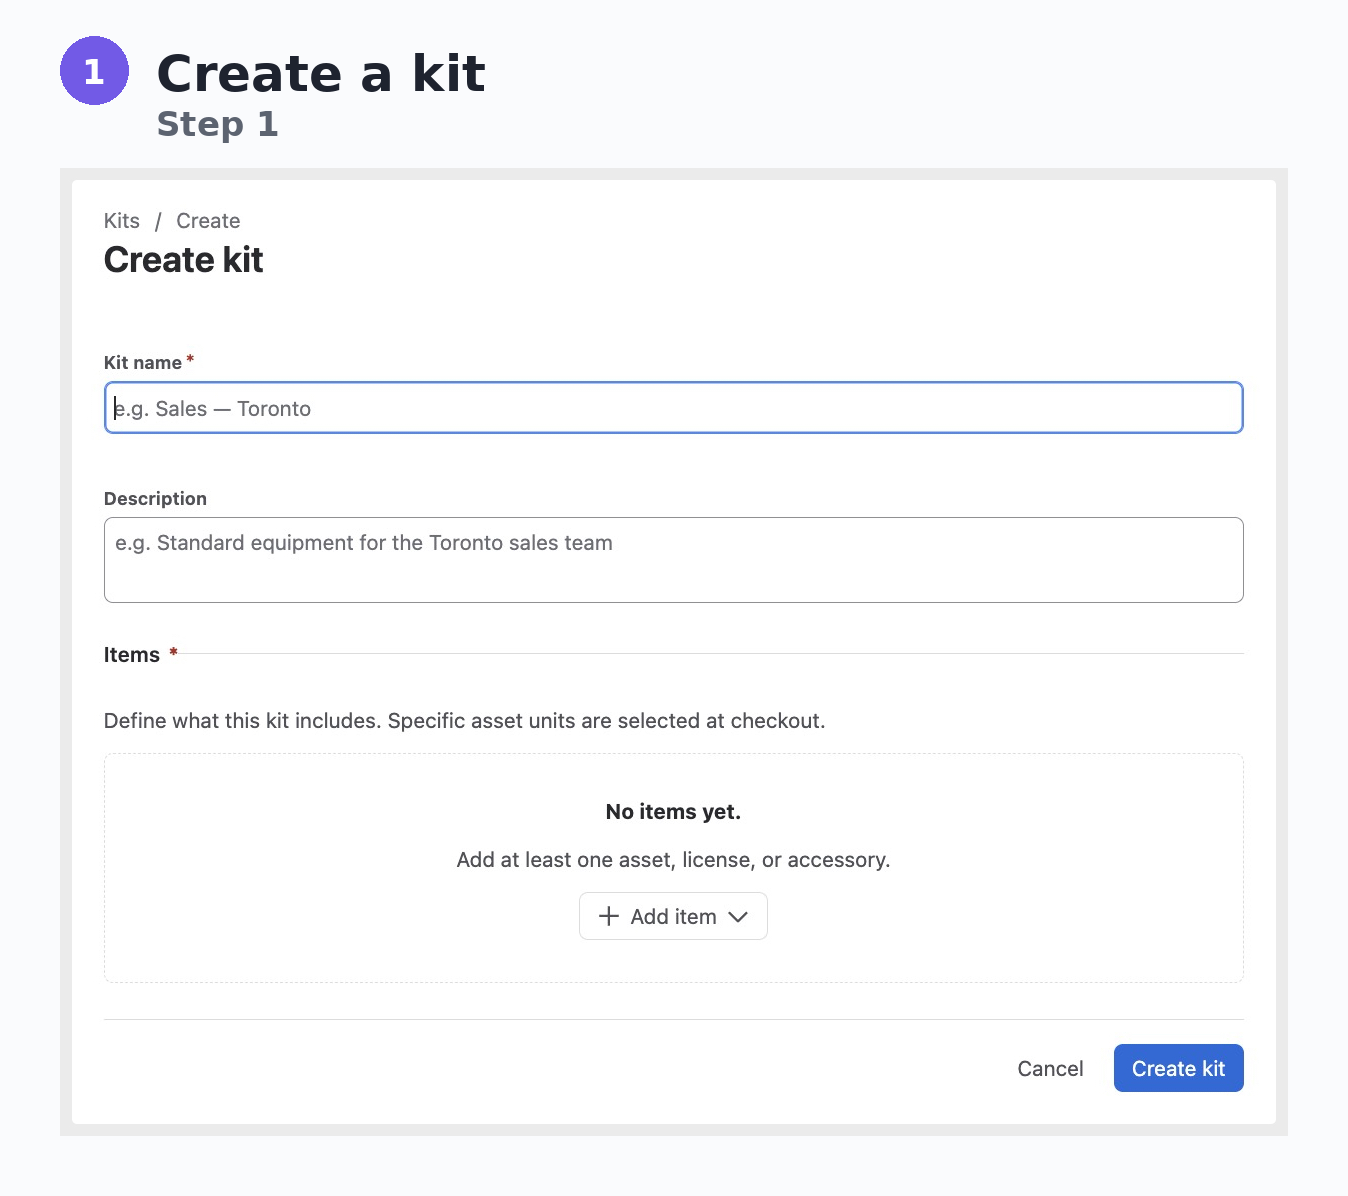
- Select Kits from the left-hand navigation.
- Select Add Kit.
- Enter a Kit name. You can also add a description to help your team identify its purpose.
- Under Items, select Add item. (Add the assets, licences, and/or accessories the kit should include) You can add more than one item and set the quantity needed for each item.
- Select Create kit.
Check out a Kit
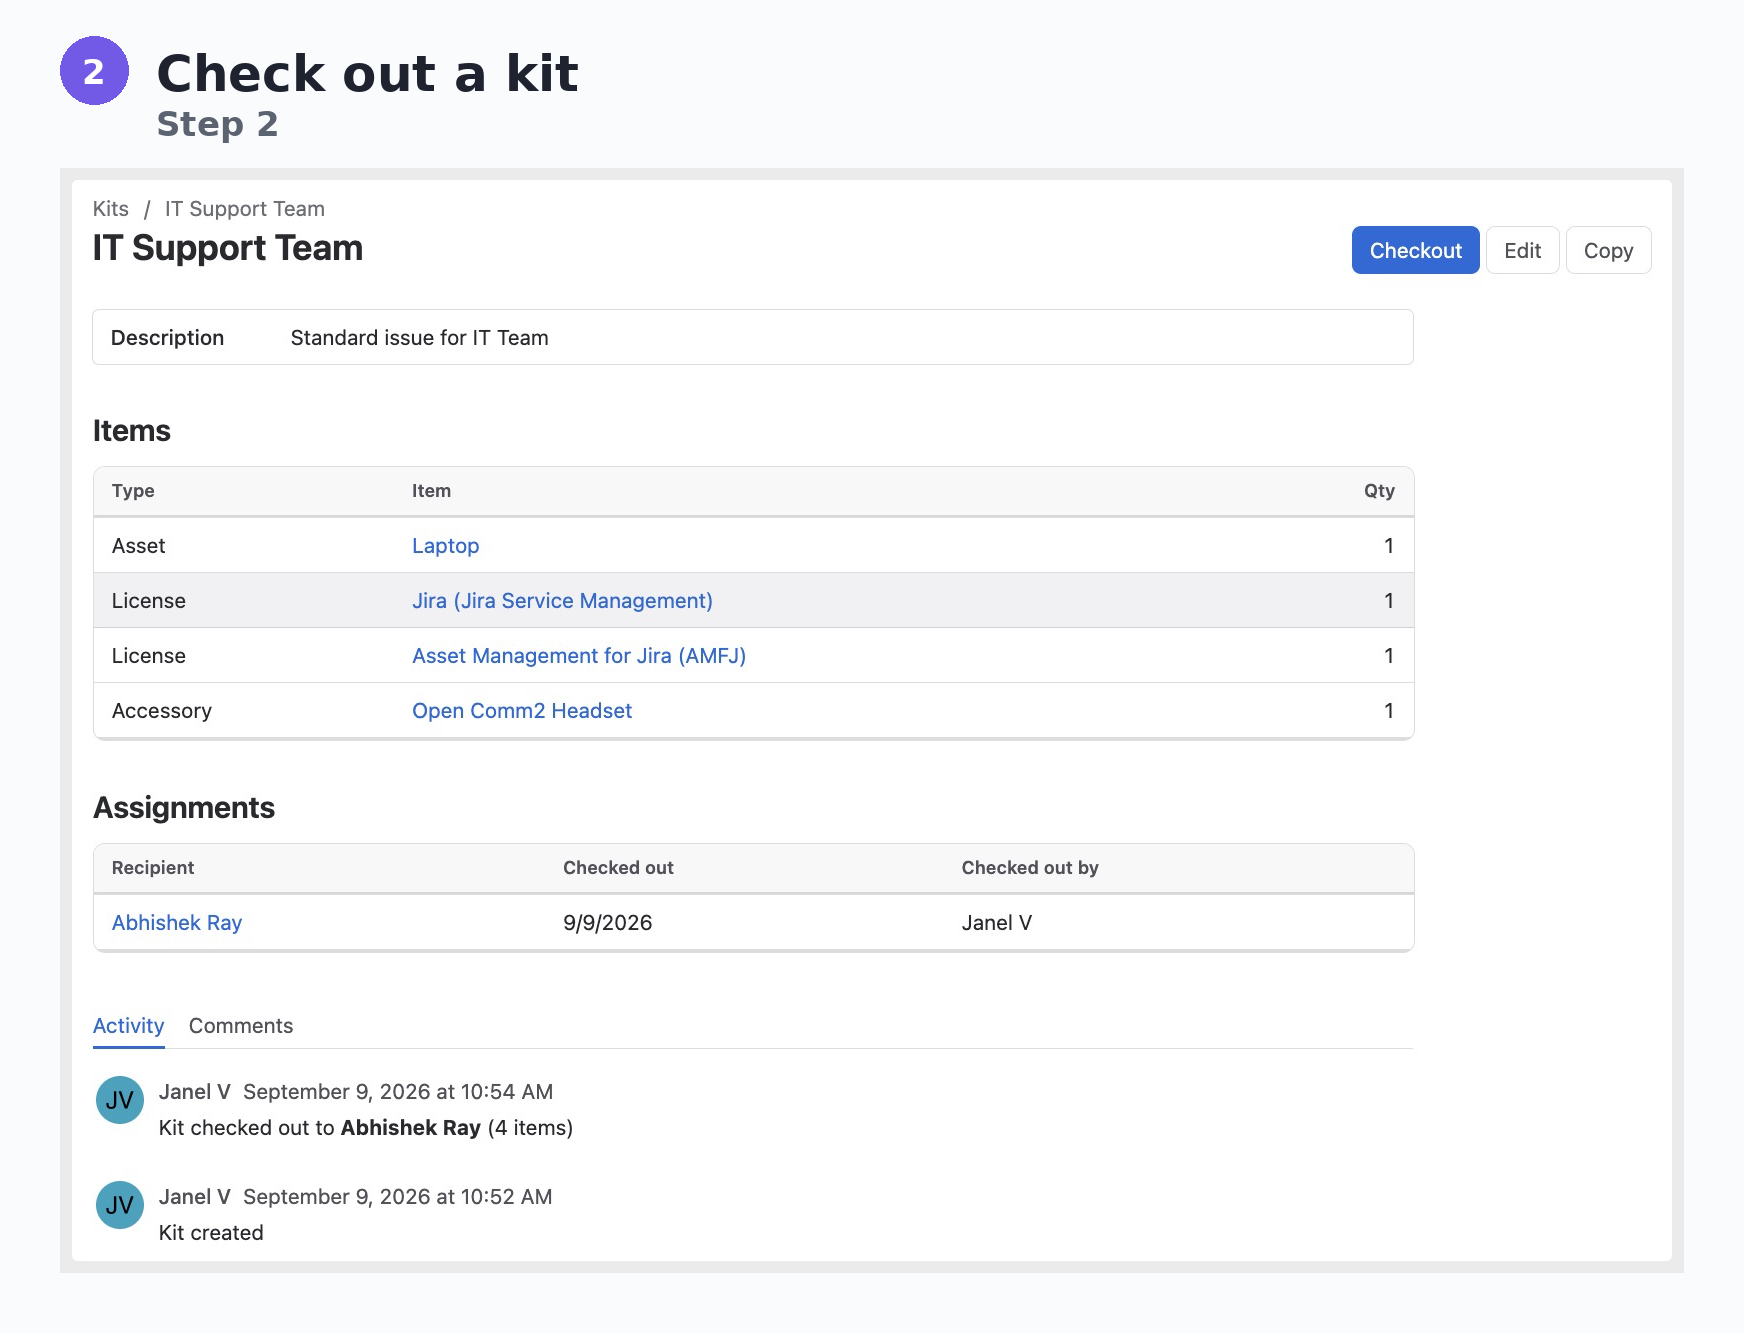
- Go to Kits and open the kit you want to issue.
- Select Checkout.
- Choose the user who will receive the kit.
- For each asset in the kit, select the specific available asset to check out. The kit also displays its licences and accessories.
- Select Check out kit to complete the assignment.
All required items must be available before the kit can be checked out.
After checkout, the kit page shows who received the kit, when it was checked out, and who completed the checkout. The activity log and Audit Log records the action as well.
Check in From the User Profile
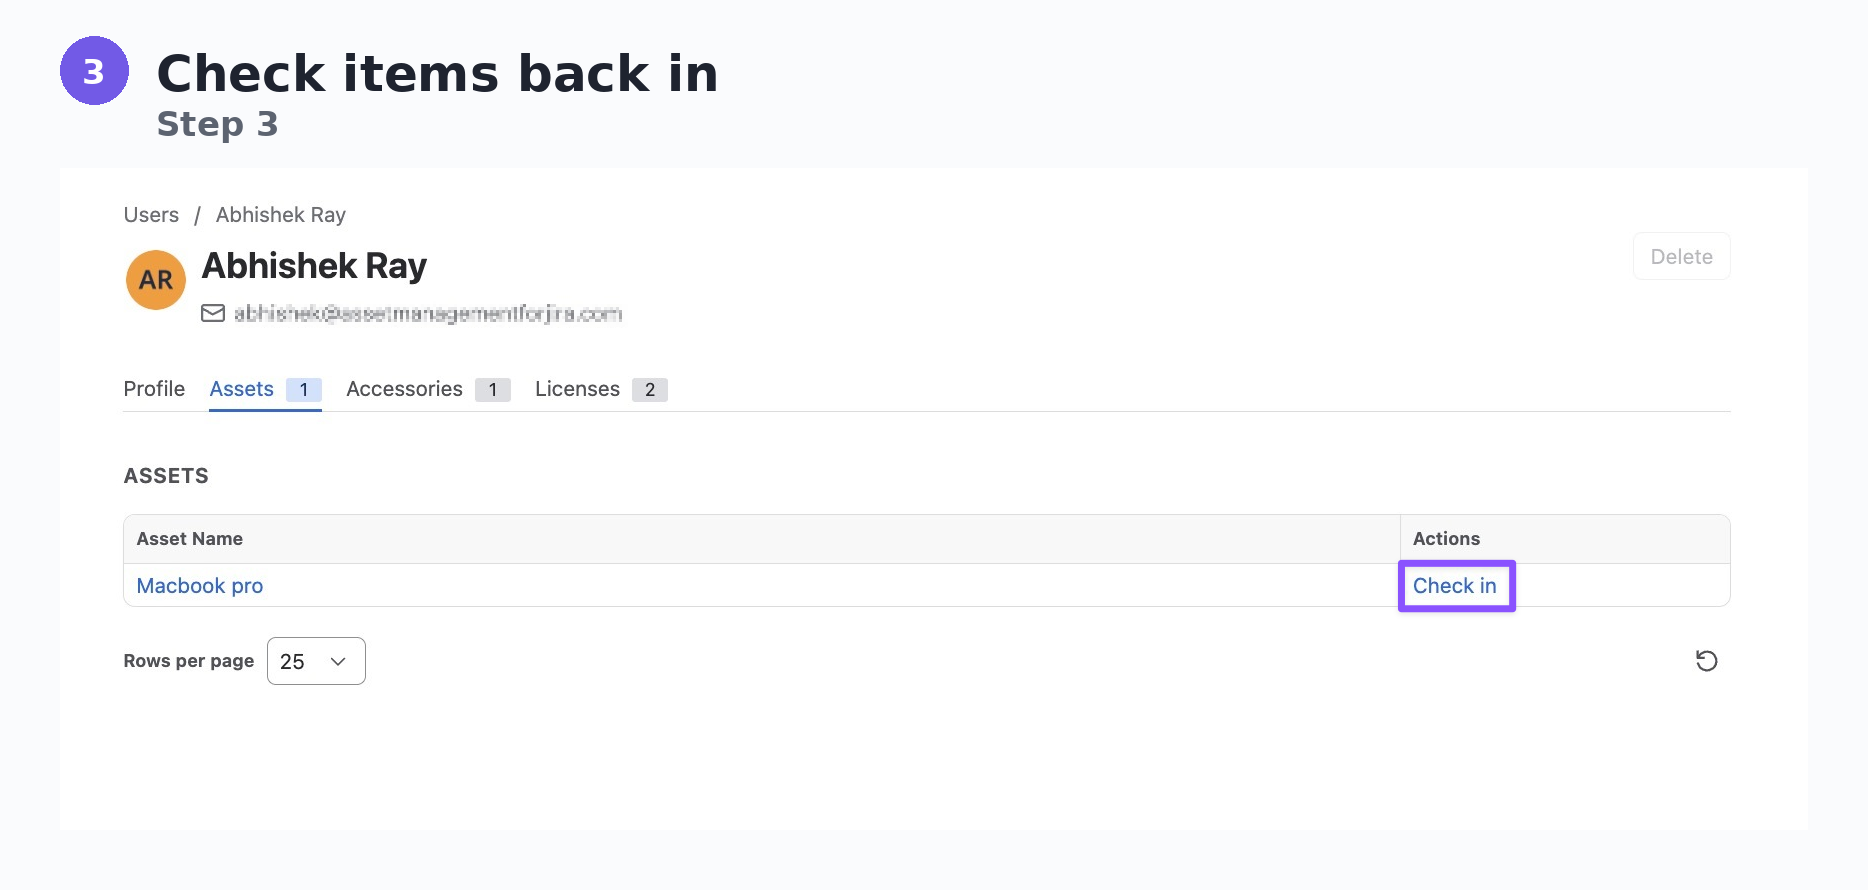
When off-boarding a team member, all items can now be checked in from their user profile, instead of opening each individual asset, accessory, or licence record.
- Go to Users and select the user.
- Open the Assets, Accessories, and Licenses tab.
- Select Check in beside each item you want to return.
Items are checked in individually from the relevant tab in the user profile.
Need help?
If you have questions about Kits, please contact us at support@assetmanagementforjira.com.